Appendix
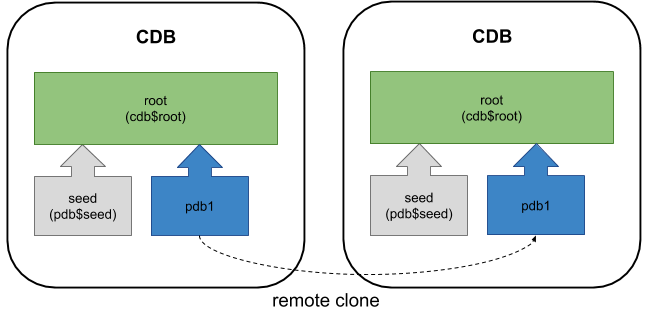
In the initial release of Oracle Database 12c Release 1 (12.1.0.1) remote cloning of PDBs was listed as a feature, but it didn't work. The 12.1.0.2 patch fixed that, but also added the ability to create a PDB as a clone of a remote non-CDB database. The biggest problem with remote cloning was the prerequisite of placing the source PDB or non-CDB into read-only mode before initiating the cloning process. This made this feature useless for cloning production systems, as that level of down-time is typically unacceptable. Oracle Database 12c Release 2 (12.2) removes this prerequisite, which enables hot cloning of PDBs and non-CDBs for the first time.
This article is an update of one written for a previous version, seen here . The previous article is still valid for Oracle 12.2, but it doesn't represent hot cloning.
- Prerequisites
- Cloning a Remote PDB
- Cloning a Remote Non-CDB
- Appendix
Related articles.
The prerequisites for cloning a remote PDB or non-CDB are very similar, so I will deal with them together.
In this context, the word "local" refers to the destination or target CDB that will house the cloned PDB. The word "remote" refers to the PDB or non-CDB that is the source of the clone.
- The user in the local database must have the privilege in the root container.
- The remote CDB must use local undo mode. Without this you must open the remote PDB or non-CDB in read-only mode.
- The remote database should be in archivelog mode. Without this you must open the remote PDB or non-CDB in read-only mode.
- The local database must have a database link to the remote database. If the remote database is a PDB, the database link can point to the remote CDB using a common user, the PDB or an application container using a local or common user.
- The user in the remote database that the database link connects to must have the privilege.
- The local and remote databases must have the same endianness.
- The local and remote databases must either have the same options installed, or the remote database must have a subset of those present on the local database.
- If the character set of the local CDB is AL32UTF8, the remote database can be any character set. If the local CDB does not use AL32UTF8, the character sets of the remote and local databases much match.
- If the remote database uses Transparent Data Encryption (TDE) the local CDB must be configured appropriately before attempting the clone. If not you will be left with a new PDB that will only open in restricted mode.
- Bug 19174942 is marked as fixed in 12.2. I can't confirm this, so just in case I'll leave this here, but it should no longer be the case. The default tablespaces for each common user in the remote CDB *must* exist in local CDB. If this is not true, create the missing tablespaces in the root container of the local PDB. If you don't do this your new PDB will only be able to open in restricted mode (Bug 19174942).
- When cloning from a non-CDB, both the the local and remote databases must using version 12.1.0.2 or higher.
In the examples below I have three databases running on the same virtual machine, but they could be running on separate physical or virtual servers.
Connect to the remote CDB and prepare the remote PDB for cloning.
Create a user in the remote database for use with the database link. In this case, we will use a common user in the remote CDB.
Check the remote CDB is in local undo mode and archivelog mode.
Because the remote CDB is in local undo mode and archivelog mode, we don't need to turn the remote database into read-only mode.
Switch to the local server and create a "tnsnames.ora" entry pointing to the remote database for use in the clause of the database link.
Connect to the local database to initiate the clone.
Create a database link in the local database, pointing to the remote database.
Create a new PDB in the local database by cloning the remote PDB. In this case we are using Oracle Managed Files (OMF), so we don't need to bother with parameter for file name conversions.
We can see the new PDB has been created, but it is in the MOUNTED state.
The PDB is opened in read-write mode to complete the process.
As with any PDB clone, check common users and the temporary tablespace is configured as expected.
Connect to the remote database to prepare it for cloning.
Create a user in the remote database for use with the database link.
Check the remote non-CDB is archivelog mode.
In Oracle 12.1 we would have switched the remote database to read-only mode before continuing, but this is not necessary in Oracle 12.2 provided the source database is in archivelog mode.
Switch to the local server and create a "tnsnames.ora" entry pointing to the remote database for use in the clause of the database link.
Connect to the local database to initiate the clone.
Create a database link in the local database, pointing to the remote database.
Create a new PDB in the local database by cloning the remote non-CDB. In this case we are using Oracle Managed Files (OMF), so we don't need to bother with parameter for file name conversions. Since there is no PDB to name, we use "NON$CDB" as the PDB name.
We can see the new PDB has been created, but it is in the MOUNTED state.
Since this PDB was created as a clone of a non-CDB, before it can be opened we need to run the "$ORACLE_HOME/rdbms/admin/noncdb_to_pdb.sql" script to clean it up.
The PDB can now be opened in read-write mode.
As with any PDB clone, check common users and the temporary tablespace is configured as expected.
The following DBCA commands are used to create and delete the CDB instances and PDBs used for these examples.
As explained earlier, in all cases Oracle Managed Files (OMF) was used so no file name conversions were needed. Also, the source databases were switched to archivelog mode.
For more information see:
Hope this helps. Regards Tim...