Transport Database
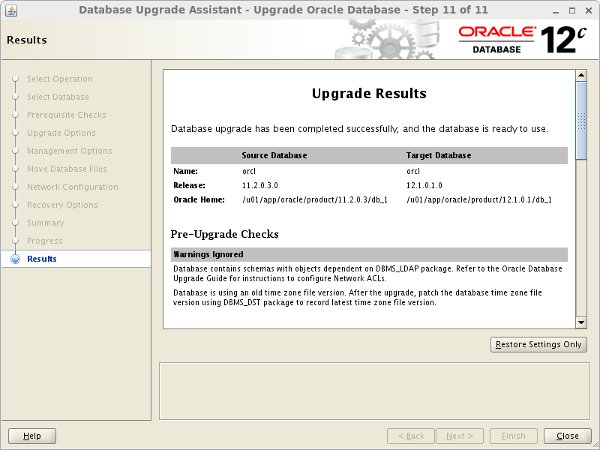
The upgraded database is now available.
Remember to alter any script or profile files that contain references to the environment variable.
The DBUA can be run in silent mode if the correct command line parameters are passed.
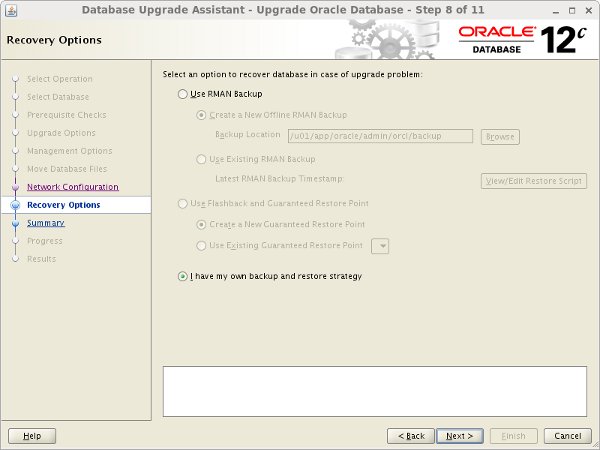
Backup the database before starting the upgrade process. In the event of a failure, you will need this backup to allow you to recreate your starting point.
In 12.1 the database is shipped with a "preupgrd.sql" script, but this has been replaced by the "preupgrade.jar" file downloaded from MOS 884522.1 . The "preupgrade.jar" file is shipped with later releases, but you should always download the latest version lined from MOS 884522.1 as it is constantly being improved. Don't rely on the shipped script!
The way you run the JAR file depends on what you are trying to achieve, as described in the upgrade documentation for your version. The following example does the pre-upgrade checks for the whole database, including all PDBs if you are using a container database.
Since we've not specified and output directory, any fixup scripts will be located in the "ORACLE_HOME/cfgtoollogs/dbunique_name/preupgrade" directory.
The remainder of this section is based on the output of the "preupgrd.sql" script, which was used when this article was originally written. The output is similar to that of the "preupgrade.jar", which is why it remains here as an example of the output, and the upgrade steps are the same.
To run the old Pre-Upgrade Information Tool, copy the "preupgrd.sql" and "utluppkg.sql" scripts from the 12c home to a location accessible by the database that needs upgrading. In this example I used a directory under "/tmp".
Make sure the is set and run the "preupgrd.sql" script from SQL*Plus.
The Pre-Upgrade Information Tool produces 3 scripts.
- preupgrade.log : The results of all the checks performed. You need to check this to see if it is safe to continue with the upgrade.
- preupgrade_fixups.sql : A fixup script that should be run before the upgrade.
- postupgrade_fixups.sql : A fixup script that should be run after the upgrade.
Assuming there are no show-stoppers in the "preupgrade.log" file, run the "preupgrade_fixups.sql" script. Any changes it can't perform are flagged as "MANUAL ACTION SUGGESTED".
As you can see, in this case, the suggested changes were as follows.
Copy the parameter and password files from the old home to the 12c home.
If the "preupgrade.log" file contains references to deprecated initialization parameters, make the suggested changes to the parameters now before continuing.
Edit the "/etc/oratab" file, setting the new value.
Make sure the environment is set to the 12c home.
Start the database in upgrade mode.
Remember, if you are upgrading an existing database using the multitenant architecture, all PDBs need to be opened in upgrade mode, or they won't be upgraded.
Run the new Parallel Upgrade Utility (catctl.pl).
You can alter the level of parallelism using the "-n" parameter. For example, the following command runs the upgrade with a parallel level of 8.
You can see an example of the output from this utility here .
Startup the upgraded database and run the "utlu121s.sql" script to check the summary of the upgrade results.
You can see the upgrade failed for the "Oracle OLAP API" section, which is a feature we removed before the upgrade, so it is OK to continue.
If we had no errors, the "catuppst.sql" script would have been run as part of the upgrade. Since we did have errors, we need to run it manually.
If the "postupgrade_fixups.sql" file contained any recommendations, run it now.
The following items are not essential, but the upgrade manual suggests it is a best practice to run them.
The upgraded database is now available.
Remember to alter any script or profile files that contain references to the environment variable.
As with previous releases, the export/import process can be used to transfer data between versions. Export the data using the utility from the source version and import using the 12c version of .
The basic export/import method allows you to move data directly to a pluggable database.
The option of an upgrade via a transport database is possible for 11.2.0.3 or later. The process is broken down into the following basic steps.
I'll discuss some of these steps in more detail below. The example is based on an upgrade on the same host, so no file conversion is necessary.
Create a new 12c database using the DBCA.
My source database was called "orcl", so I created a clean 12c database called "orcl12c", without the sample schemas. Make sure the character sets match.
With the 12c database in place, we must prepare the 11g database for the export. I was testing this on a clean installation of 11.2.0.3, so I had to create a directory object for the export, as well as a little dummy data.
Export the database, using the " " parameters. I excluded the "USER" tablespace as it was already present in the 12c database and there was nothing I wanted to transfer in that tablespace.
The export contains just metadata for the data tablespaces, but includes the normal dump contents of the SYSTEM and SYSAUX tablespaces.
Copy the datafiles to the correct location for the 12c database.
At this point it probably makes sense to switch the tablespaces back to read-write and shutdown the 11g database.
We can now import the dump file into the 12c database. This of course assumes you have already created the directory object in the 12c database, as mentioned previously.
The 12c database now contains all the data from the original database.
There are a number of variations on this process, including changing platforms using the RMAN command, or the package. These are covered in documentation.
For more information see:
Hope this helps. Regards Tim...